オーディオの部屋
Wellcome to my AUDIO room
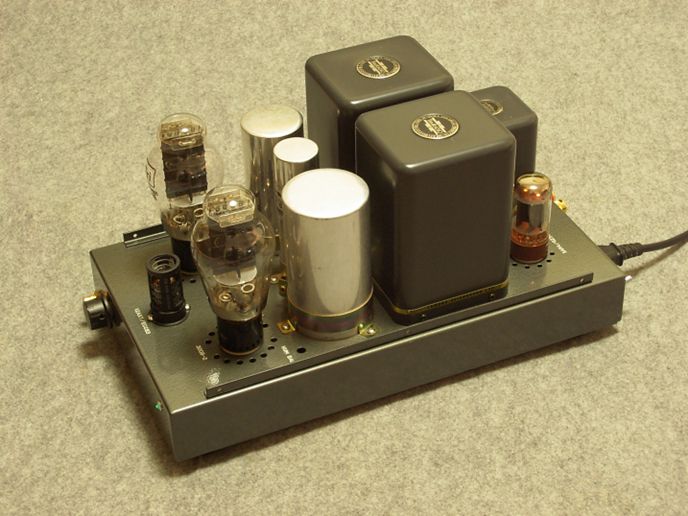
300B プッシュプルアンプの製作
300b push-pull amplifier production
今から約10年前に設計製作した、300Bプッシュプルアンプをご紹介します。
I will present about 300B vacuum tube amplifier, which I produced about ten years ago.
わたしは中学生のころからオーディオに興味を持ち、その頃からスピーカーの自作を何回かしていました。今から約10年前に偶然読んだオーディオ雑誌に、真空管アンプの製作記事が載っていました。回路が簡単そうだったので、自分にも作れると思い挑戦することにしました。(ここでご紹介している300Bアンプは、6BQ5アンプに続く自作2台目になります。)
Audio is one of my hobbys from when I was a junior high school student. The plans to build a tube amplifier were printed in an audio magazine that I read about ten years ago. I thought that it was challenging but easy enough that even I could produce the circuitry and amp. This was my chance to produce a vacuum tube amplifier.
1. 設計
Design
外観設計
Design of externals
アンプ設計としてはまだ2台目ですし、あまり凝った作りにすると失敗するリスクが高いので、古いスタイルの単純なデザインを採用することにしました。
真空管アンプはシングルだと数ワットの小さい出力のものが主流ですが、なるべく大きな出力が欲しかったため、今回はプッシュプル方式を採用することにしました。
Usually, the tube amplifiers only have a few wats of power. But I wanted high power so I chose the 'push-pull' type of circuit.
回路設計
Design of circuitry
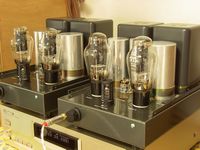
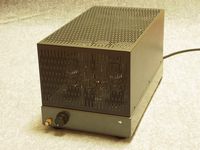
また、大型になるのをきらい、モノラルアンプ2台を製作することにしました。
回路設計の詳細はこちらです。
2. 使用した部品について
Parts
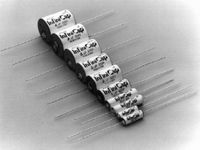
真空管
Vacuum tubes
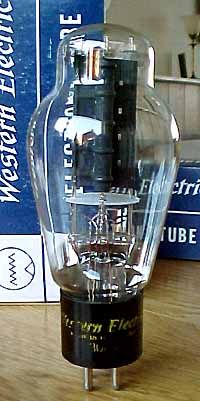
出力管にはオーディオ用として最も有名な300Bを使用しました。高いものは1本10万円ほどします。でも私は1本1万5千円のトライオード製ものを使いました。
左の写真はウエスタンエレクトリック製の300Bで大変高価ですが、とても良い音がすると評判です。お金を貯めていつかは手に入れてみたいものです。
For the parts of the amp, I used the very famous audio tube '300B' for the vacuum tubes. It costs about $1,000 for one piece of the most expensive type. But, I bought an economy one that only cost $150. I do hope to buy the expensive one in the future.
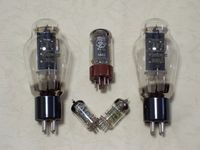
今回のアンプでは、片チャンネルあたり合計5本の真空管を使います。
左がその写真です。
トランス
Transformers
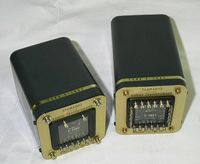
トランスは真空管と同じくらい、いやそれ以上に音に影響を与える重要なパーツです。特に出力トランスは音質にもっとも影響を与えます。ですから今回は思い切って、一流メーカー製のパーマロイコアを使用したとても高価な出力トランスを使用しました。
The output transformers are the most important parts for sound character. So, I used a flagship model from a first class manufacturer. They use permalloy cores.
その他の部品
Other parts
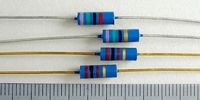
抵抗やコンデンサもオーディオ用の高級品を使用しました。抵抗はリケノーム、コンデンサーは全てフィルムコンデンサーを使用しています。
3. 製作
Production
主要パーツの取り付け
Main parts installation
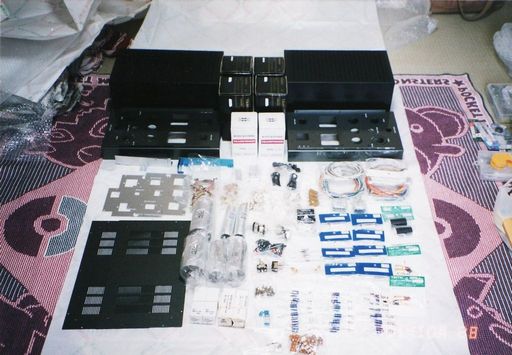
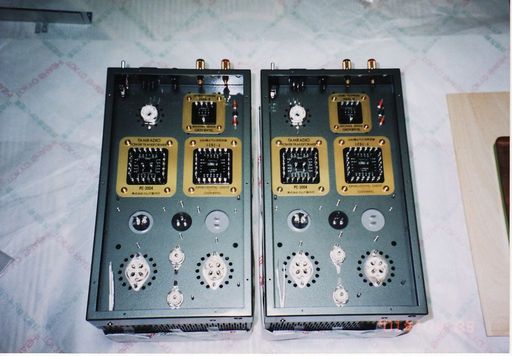
左の写真がすべてのパーツを並べた状態です。これからはじまる組立作業が一番楽しい時間で、ワクワクします。
はじめにシャーシの表面に小さなパーツを取り付け、それから大きなパーツの順番に取り付けていきます。次にシャーシをひっくり返して内部にもパーツを取り付けていきます。
今回はボンネットを早々と取り付けて、内部の作業を効率的に進めました。
The production was the most interesting thing to me. It was very fun. At first, I installed some big main parts in the surface of the chassis. Then I installed other big parts in the chassis inside.
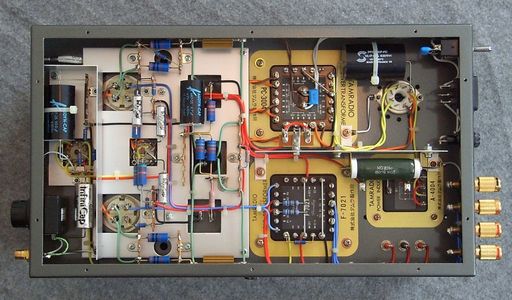
配線と抵抗類の取り付け
Wiring and small parts installing
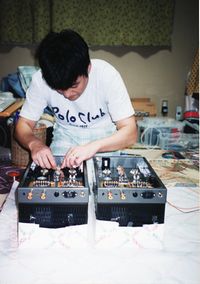
パーツ間に電線をはんだ付けします。ここが一番力を入れたところで、ご覧の通りとても綺麗に仕上がりました。最後に抵抗とコンデンサーを取り付けて完成です。
Next operation was wiring. It was the most important thing to me, because I tried for beauty of the inside of the chassis. So, I soldered wires between all parts very carefuly. Then, the inside of the chassis had a very beautiful construction. The last operation was small parts installation. Small resistors and capacitors are installed with care for balance. It was like a Jewel box.
4. 視聴
Hearing
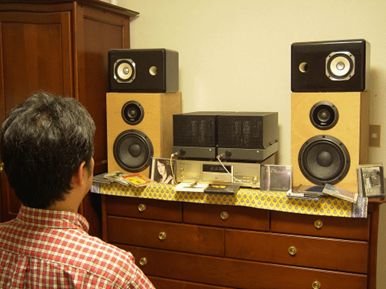
視聴してみました。音には特に特徴はなく、以外に普通の音でした。しかしボリュームを上げても歪やノイズ感がありません。それまで使っていたソリッドステートアンプはボリュームを上げるとうるさく感じたのですが、それが感じられません。各楽器の分離も明確です。また、音の細部もはっきり聞こえます。
普段はCDをよく聴きますが、CDによるレーコーディングの良し悪しがはっきりわかります。製作して約10年が経ちましたが、今でもこのアンプを愛用しています。
The sound had no special features. But it had a very good sound. Distortion was hardly felt and even if the volume was raised, it was not noisy. The separation of instruments was very good and music details could be heard clearly.
Usually, I listen to CDs often. I can hear the difference of recording conditions by this amplifier. Now, I'm still using this amp after ten years passed since I produced it.